|
|
|||||
 |
|||||
 |
|||||
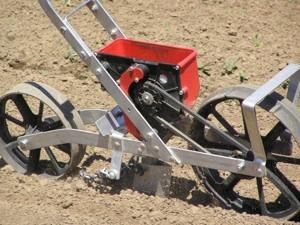
Earthway Precision Seeder REVIEW August 2011 The Earthway Precision seeder is not particular precise, but despite that, it’s an incredible seeder for the small farm, even more so than for most gardens. It’s much less expensive than any other decent push seeder out there, it’s easy to handle and carry, it comes with enough plates that you can seed pretty much anything, it’s easy to empty the hopper (with a little practice and technique), it can be modified in useful ways. If you only have one seeder and you’re seeding a wide range of seeds this is a great option for seedings from 10 row feet to 10,000 row feet. |
|
 |
||
Ok, so I wouldn’t buy it if you’re just seeding 10’, but if you’re seeding 10’ on a regular basis I might go for it. If you’re seeding 10,000’ of one crop on a regular basis I wouldn’t buy it either, but it will do the job, and do it decently well if you’re only doing that much once a year. Where this thing is great is in the 50’-500’ range, especially if you’re making several seed and seed plate changes during a seeding session. It’s especially suited to lighter soil. The thing is light weight, which makes it great for carrying around and easier to get the seed out of, but it doesn’t make it great for plowing through heavy clods or rocks in the soil While I’m talking about things it’s not good at, and other problems, here a little list:
|
|
 |
||
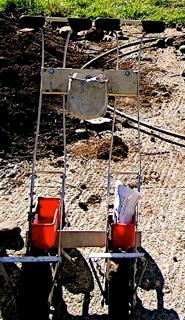
There are probably more I could come up with, but that’s more than is really important. Lots of folks I know gang these together. Two together is the most common and the ones below just have two pieces of wood bolted to them (they are carefully cut, but that doesn’t show. They are 12” apart. The bag up top is holding the extra seed plates. This makes them heavier and it makes the seed harder to remove, but it also saves a lot of walking over time. Be warned, if you gang three together you’ll have to have really flat beds so that all three drive wheels are touching the ground all of the time. There are ways to get around this by creating a jackshaft that is powered by just one wheel. Sometimes folks just replace the front wheels in these gangs and replace them with a single roller (usually made from PVC pipe. |
|
 |
||
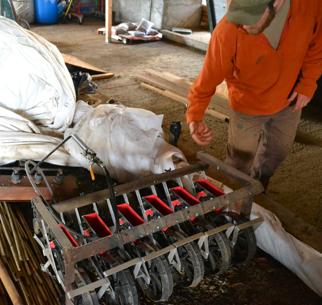
Here’s my friend Chris below with six ganged together and ready to mount on an Allis Chalmers G tractor. Again, you’ve got to have a very flat bed for this to work the way he has it set up. |
|
 |
||
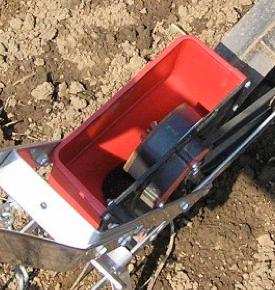
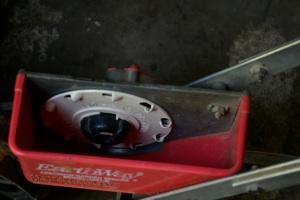
The photo below shows a beet plate. Those little cups rotate, picking up seed from the bottom of the hopper (as long as you have enough in the hopper), and dropping them out the back down a hole part way up the back (make sure not to fill the seed hopper over the max line, which is right around the spot where it reaches its maximum width, and also happens to be about the spot where the hole behind the plate starts. |
|
 |
||
So again, here’s a little summary of what I think are the good features:
|
|
I add to this site because I like collecting this information and I’ve found similar sites incredibly helpful. I hope this site is helpful for you, and if it is, please consider a donation to help me spend more time putting up more. Thanks! |
other places you can find me |
|||||||
 |
 |
|||||||
© joshvolk.com |
|